01The Physical Challenge of Multi-Color Layer Drift
When cutting decals or multi-colored signage across multiple vinyl rolls, the cutter treats each roll pass as an entirely independent coordinate universe. Microscopic roller slip, film elasticity, and drag blade friction inevitably introduce fractional shifts, making manual visual alignment during transfer nearly impossible without dedicated references.
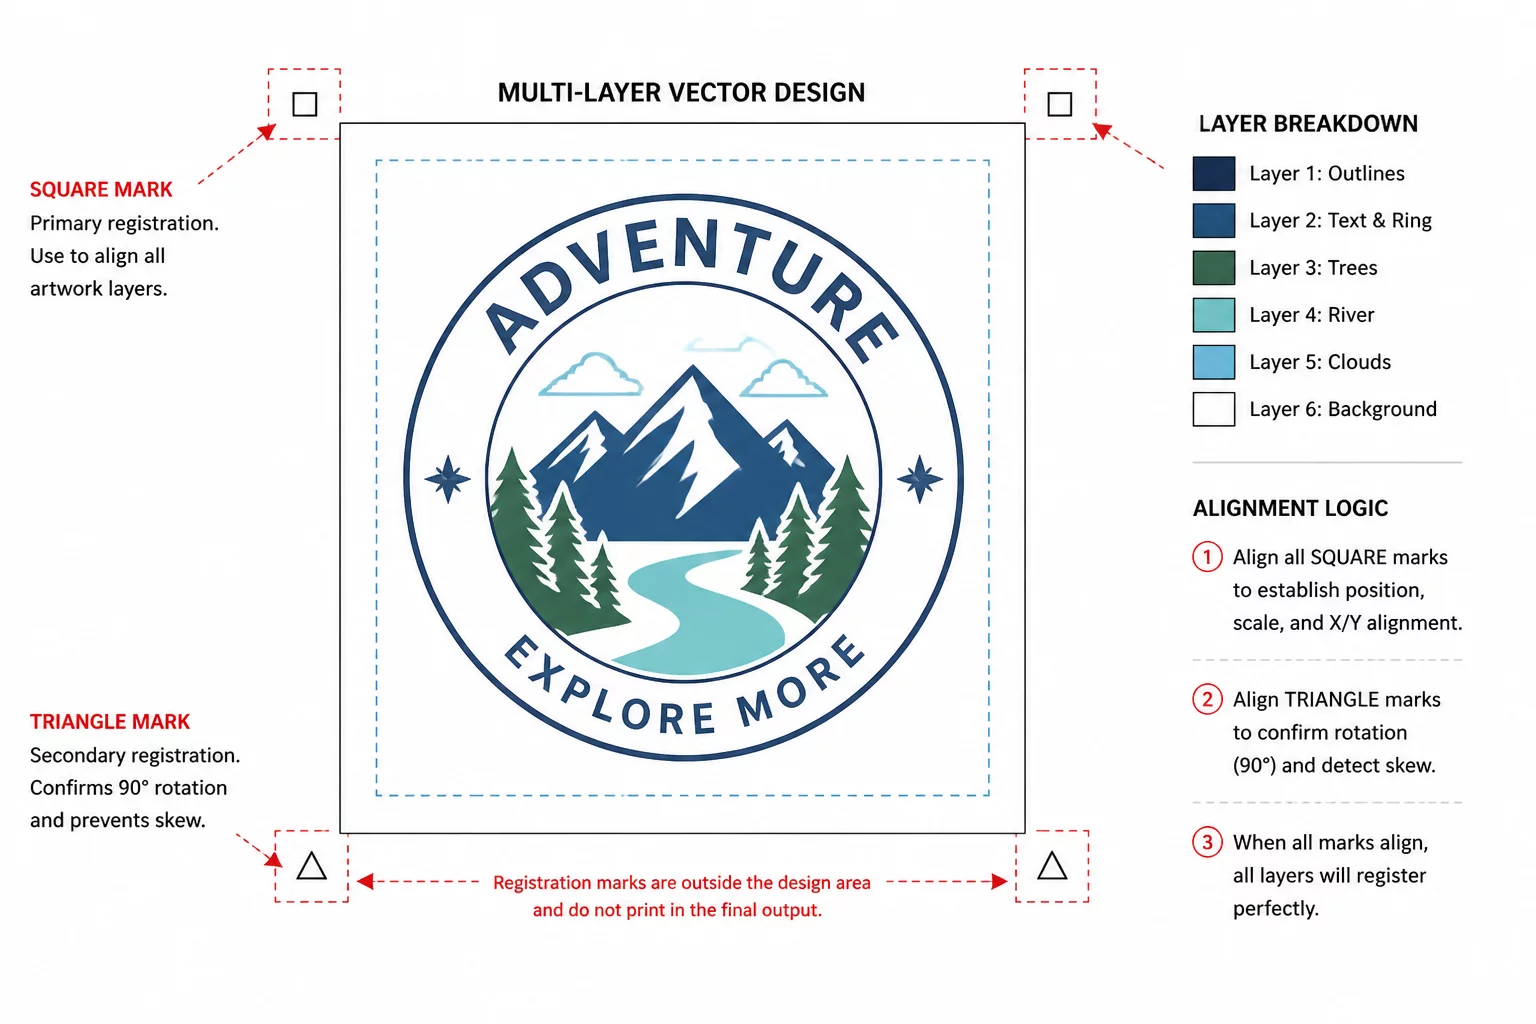
Registration marks eliminate this mechanical discrepancy by embedding identical vector reference targets directly into the cutting perimeter of every single color layer. By aligning clean, rigid geometric guides instead of complex organic curves, operators gain reference points for checking physical assembly.
Key Takeaways
- Every color layer file must include identical registration mark geometry cloned in identical vector coordinates.
- Solid squares or L-brackets provide significantly better transfer tape adhesion than thin lines or hairline crosses.
- Position marks asymmetrically around the master bounding box to prevent accidental 180-degree layer inversion.
02Shape Geometry: Why Squares Outperform Thin Crosshairs
Novice designers frequently copy thin crosshair marks from traditional offset printing prepress workflows. In vinyl cutting, however, narrow strokes create tiny, delicate vinyl filaments that snag on the blade tip, lift during rapid travel moves, and curl off the wax backing sheet during weeding.
Printing prepress marks rely on visual transparency and microscopic lines; vinyl registration requires sturdy planar geometry that withstands blade drag and transfer tape peeling without warping.
Solid geometric shapes like 8 mm squares or sturdy L-corner brackets supply ample contact area for the adhesive layer. Their orthogonal 90-degree edges allow the operator's eye to detect minute angular rotation and horizontal mismatch with extreme clarity.
03Placement & Margin Rules Outside the Bounding Box
The spatial position of registration anchors directly impacts alignment accuracy. Machine feeding variations amplify over distance, requiring strict layout geometry:
- Place primary dual markers horizontally along the upper margin of the composite artwork bounding box with 10 mm clearance.
- Add an asymmetrical third marker in the bottom-left corner to enforce unambiguous rotational orientation during assembly.
- Group the master mark shapes with each individual color layer before exporting separate cutting tasks or sending jobs to the plotter.
Locking the anchor coordinate frame ensures that every vinyl layer maintains an identical origin point, regardless of how small or sparse an isolated secondary accent color may be.
04Step-by-Step Transfer and Layer Stacking Routine
Begin by cutting each colored sheet with its paired registration marks. Weed all surrounding waste vinyl from the artwork and the registration marks, leaving only clean active graphics and anchor boxes resting on the silicone release liner.
Apply transfer tape over the top layer, burnish firmly, and lift both the design and the registration marks. Cut a narrow window in the backing paper directly behind the registration squares. Align these exposed sticky squares over the matching registration marks of the underlying color sheet, tack them into position, and progressively remove the remaining liner while burnishing down the final aligned composition.