01The Anatomy of Cursive Overlaps
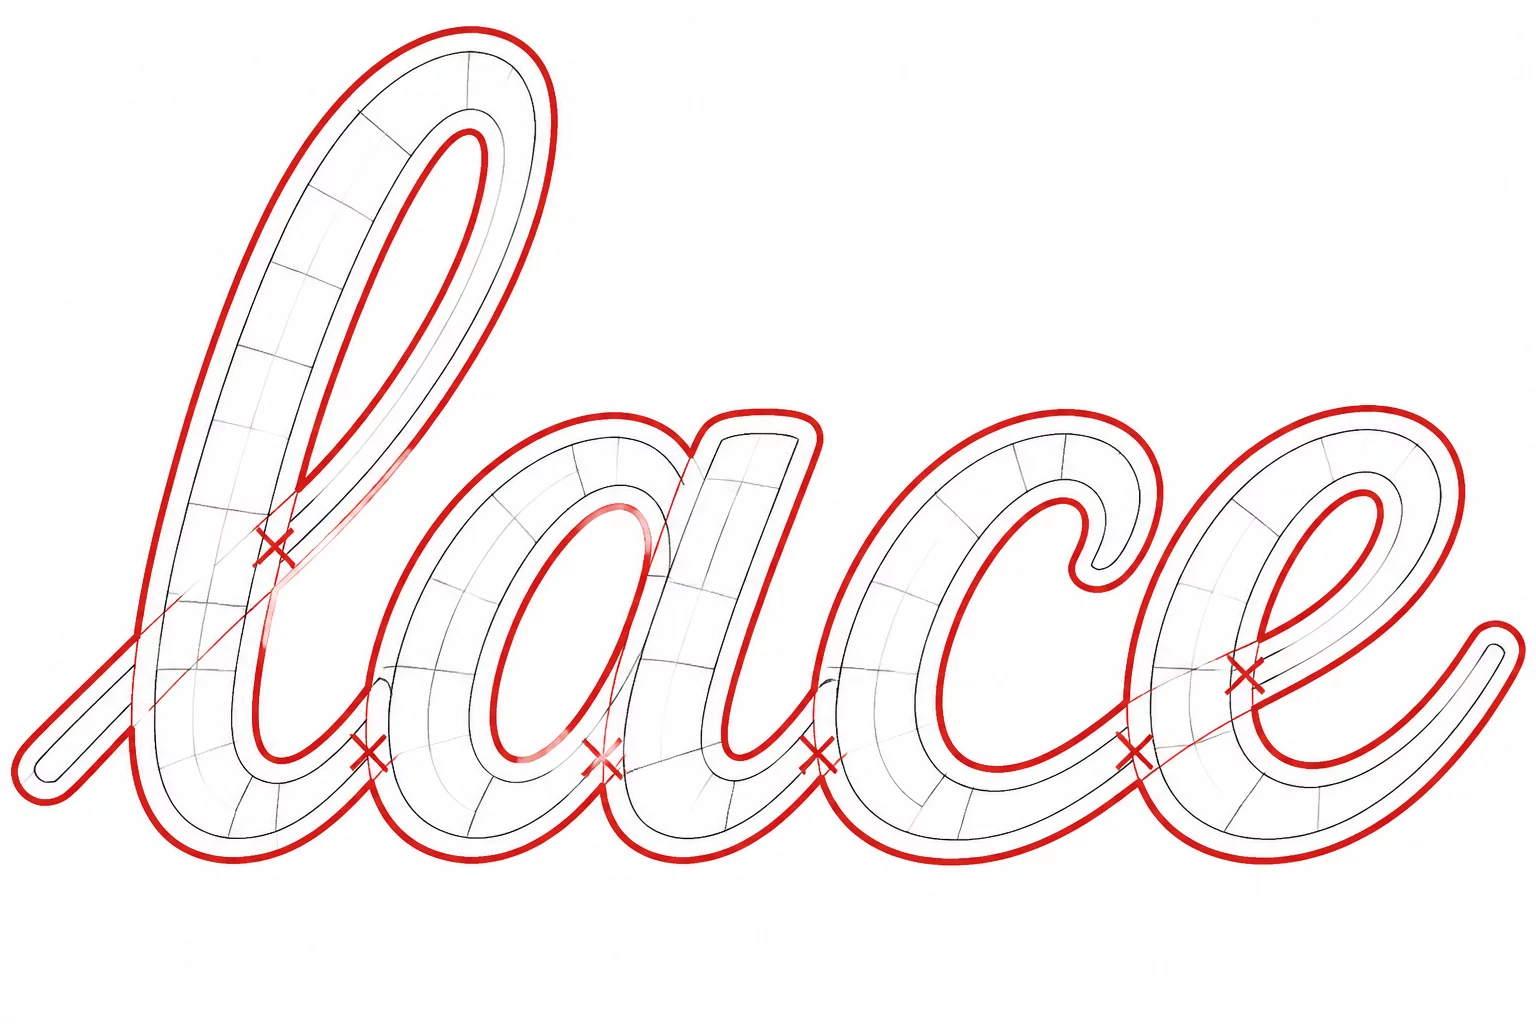
Script and calligraphy fonts present a unique visual paradox in digital crafting. On the design canvas, script characters appear as smooth, flowing words with seamless letter-to-letter transitions. Under the hood, however, digital fonts store each character as an independent vector container with its own closed contour and entry/exit swashes. When typed into vector editing software, these individual letter glyphs overlap one another physically.
Visual renderers display overlapping black fills as a unified black shape on screen. A computer plotter or laser cutter does not see visual fill colors; it strictly follows individual contour boundaries. Without specific geometry intervention, the cutting carriage lowers the blade and cuts through every internal overlapping tail, slicing the word into shredded fragments rather than a single continuous piece.
Key Takeaways
- Unwelded script fonts cause internal intersection cuts that slice connecting strokes into separate pieces.
- Applying a Boolean Union or Weld command converts overlapping boundaries into a single continuous silhouette.
- Hairline connectors below 0.5 mm require a deliberate outward offset to prevent tearing during physical weeding.
02The Hidden Destruction of Unwelded Glyphs
When an unwelded script design is sent to a vinyl plotter or laser system, the cutting head travels along the complete vector boundary of each glyph sequentially. If the letter 'l' transitions into 'o', the entry tail of the 'o' crosses right into the stem of the 'l'. The blade executes both paths, severing the physical material at the intersection. During weeding, these tiny slivers lift off the backing paper, creating jagged tears and ruining the design.
Never mistake visual font overlap for a unified cut path. A cutting plotter follows the active cut paths. Inspect the selected boundaries even when filled letters look connected on the monitor.
Executing a Boolean Weld (or Union) operation resolves these intersections by removing internal overlapping lines and reconstructing the outer perimeter as a single composite path. This transforms a sequence of colliding letter outlines into a continuous, structural ribbon of material that retains physical integrity during weeding and application.
03Thickening Fragile Hairline Transitions
Welding solves overlapping intersections, but modern brush and calligraphic scripts often feature delicate hairline upstrokes that measure less than 0.3 millimeters in physical width. Even if welded into a single path, such microscopic bridges cannot withstand blade drag forces or transfer tape peeling without snapping. Maintaining structural stability requires proactive geometry reinforcement:
- Micro-Offset Application: Generate a subtle outward contour offset (+0.02 mm to +0.05 mm) to widen ultra-thin connectors without altering the font's aesthetic character.
- Node Simplification: Eliminate redundant anchor points along the neck of the connection to prevent erratic blade stuttering and micro-tears.
- Manual Apex Expansion: Use direct node editing to gently pull thin connector vertices outward, creating a sturdier transition zone between high-mass glyph bodies.
Applying these structural thickening techniques ensures the physical connector withstands high-speed cutting passes and maintains firm adhesion during vinyl application on curved substrates.
04Verification Workflow Before Sending to Blade
Always switch your workspace view to outline or wireframe preview mode before sending any cursive text to the cutter. In wireframe mode, all vector fills disappear, revealing the raw cut paths. Inspect every junction between lowercase letters, capital swashes, and punctuation marks. If any intersecting lines remain visible inside the letter bodies, the weld operation was incomplete or applied to grouped elements rather than ungrouped path objects.
Once wireframe verification confirms a single uninterrupted perimeter with robust connector widths, test-cut a small 50 mm sample piece. Inspect the weeded sample under good lighting to ensure the script transitions pull cleanly in one uninterrupted movement without catching, snagging, or delaminating thin bridges.